Welcome to the first of our many weekly blogs. Our blogs will mostly feature workshop happenings, but we’ll be looking at all aspects of our trade over time.
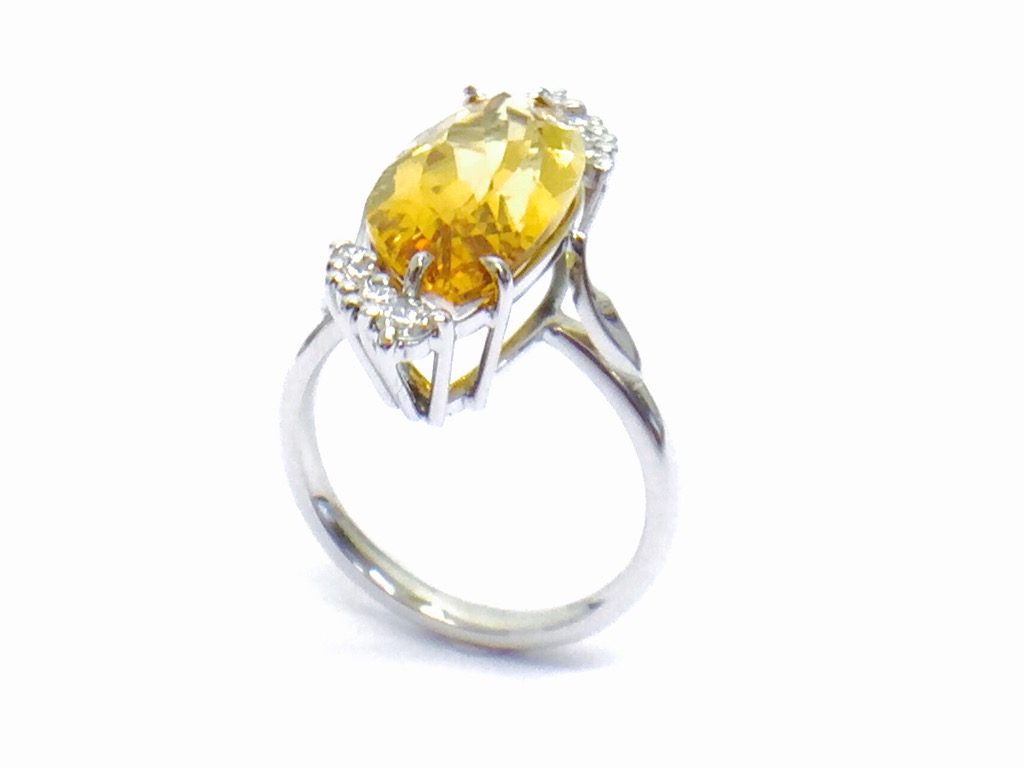
Today’s post will demonstrate how we recently produced a cocktail ring entirely from one piece of 18ct white gold square wire. Scroll to the bottom of the page to see step by step photos taking during the manufacturing process. Using rolling mills and draw plates we form the main shapes required for the project. These are round, square and d-shape sections. We’ll blog about the various tools and techniques in future posts.
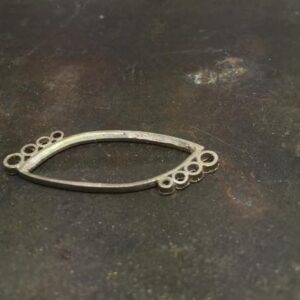
The first job is make an outline of the stone; in this case a non symmetrical, or modified, Golden Beryl. Then we make an identical shape but slightly smaller. We add the collets (a small holding structure) for each of the six diamonds and solder them, using hard solder. Solders are described as hard, medium and easy and reflect different melting points. We start with a high melting temperature, so, as the project progresses we use lower melting temperatures to prevent setting the previous joints off. The solders are lower melting point alloys of gold and lead or plumber’s solder.
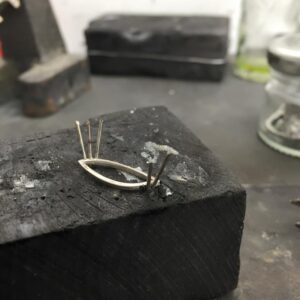
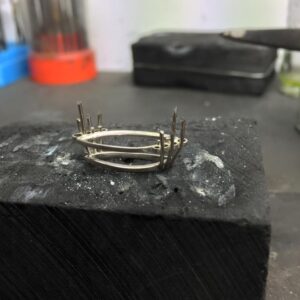
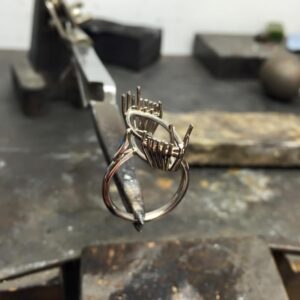
The next process is adding the wire claws. The first claws are added between the two settings and finished flush underneath, then the outer ones which extend to the lower bezel are soldered.
Claws are added and the item repeatedly cleaned and polished throughout the process until the head is complete. The claws are trimmed down and everything checked before adding the shank and shoulders, in this case elliptical to compliment the stone.
Finally, the item is barrel hardened ready for setting.
Traditionally an item like this would be handed to a craftsman or woman who would specialise in setting gemstones, and then be handed to the polisher, but in our case I take care of the whole process. The diamonds are set first and the claws finished by hand before the Golden Beryl is set last.

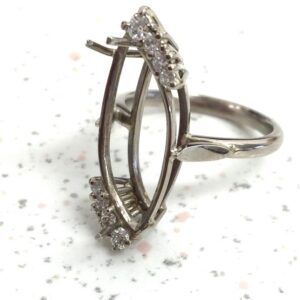
A final polish and rhodium plate and the item’s ready for the window. This item has taken four weeks on and off and demonstrates the various skills of a goldsmith. The whole process was made at our workshop and studio in Leicester. And here’s is the final product, now sitting proudly in the Wilkinson Goldsmith’s window, ready to try on when you are.


We hope you’ve enjoyed this little insight into our various skills and disciplines and look forward to bringing you more posts in the future.

